Posts do Usuário: Santana
0
0
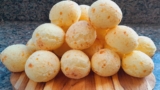
Pão de queijo com polvilho doce. Muito bom mesmo! Ao amanhecer, o café já está na mesa, e cadê o pão de queijo? Se está procurando uma receita de pão de ...
0
0
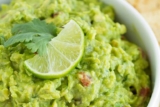
Como fazer guacamole? A receita de guacamole é uma jornada culinária que celebra a riqueza de sabores e a simplicidade dos ingredientes frescos. A princípio...
0
0
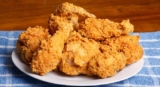
Fried Chicken: A Dance of Flavors and Textures. Ah, dear culinary enthusiasts, I invite you to explore the culinary pleasures of the iconic Fried Chicken...
0
0
Receita de Frango Frito. Ah, queridos apreciadores da culinária, convido-os a explorar os prazeres culinários do icônico Frango Frito, uma obra-prima da ...
0
0
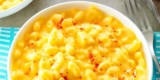
Mac 'n' Cheese: Macaroni and Cheese Recipe. Ah, the delicious and comforting Mac 'n' Cheese, a dish that has won hearts and stomachs across America.
0

0
Mac 'n' Cheese: Receita de Macarrão com queijo. Ah, o delicioso e reconfortante Mac 'n' Cheese, um prato que conquistou corações e estômagos em toda a América.
0

0
Bebida de Uva sin Alcohol: Aventura Fantástica sin resaca. Esta bebida, sin alcohol y de uva, representa una opción refinada para cualquier ocasión. Disfruta...
0
0
Non-Alcoholic Grape Drink: A Unique Flavor Experience. Indulge in sophistication with this Non-Alcoholic Grape Drink - a refined option for any occasion...
0
0
Drink de Uva sem álcool: Uma Experiência de Sabor Única. Este Drink de Uva Sem Álcool é uma opção refinada para qualquer ocasião...
0
0
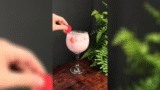
Refrescante Bebida de Fresa sin Alcohol, combinación única de fresas, leche condensada y limón. ¡Disfruta del sabor! 🍓🍹 s
Artigos do Usuário: Santana
Passando por Todos os Comentários de: Santana